 how-to
Custom Beer Glass Design Tips for Logos: 2026 Guide
Table of Contents
- Custom Beer Glass Design Tips for Logos Start With the Drink
- Pick the Glass Shape Before the Artwork
- Glass Size and Capacity: 290 ml, 390 ml and Beyond
- Logo Placement on Beer Glasses: Where It Lands and Why
- Beer Glass Logo Ideas That Survive a Busy Bar
- Choosing a Branding Method: Pad Printing, Engraving or Etching
- Etched Logo Glassware: Artwork Files, Tolerances and Production Constraints
- Proofing, Colour Matching and the Production Workflow
- Branded Glassware Gift Boxes and Dishwasher Durability
- Frequently Asked Questions
Last Updated: October 4, 2026
Custom Beer Glass Design Tips for Logos Start With the Drink
Custom beer glass design tips for logos start with the beer, not the artwork. A logo can look sharp on screen and still fail on a busy bar, because the glass shape, the pour and the drinker's hand decide how much of your brand anyone sees.
At The Glassware Company, we've produced branded drinkware for breweries, wineries and corporate events for years. The best results come from planning the glass and the logo together, so before you send artwork anywhere, answer one question: what is going into the glass?
- Pale ales and lagers suit tall, narrow shapes
- Stouts and porters suit wider, heavier vessels
- Tasting paddles suit small, matching glasses across a flight
Get that wrong and the logo is the least of your problems.
Pick the Glass Shape Before the Artwork
The glass shape decides where a logo can sit and how large it can be. Choose the vessel first, then design to fit it, the other way round means redrawing artwork later.
A few common styles and what they give you:
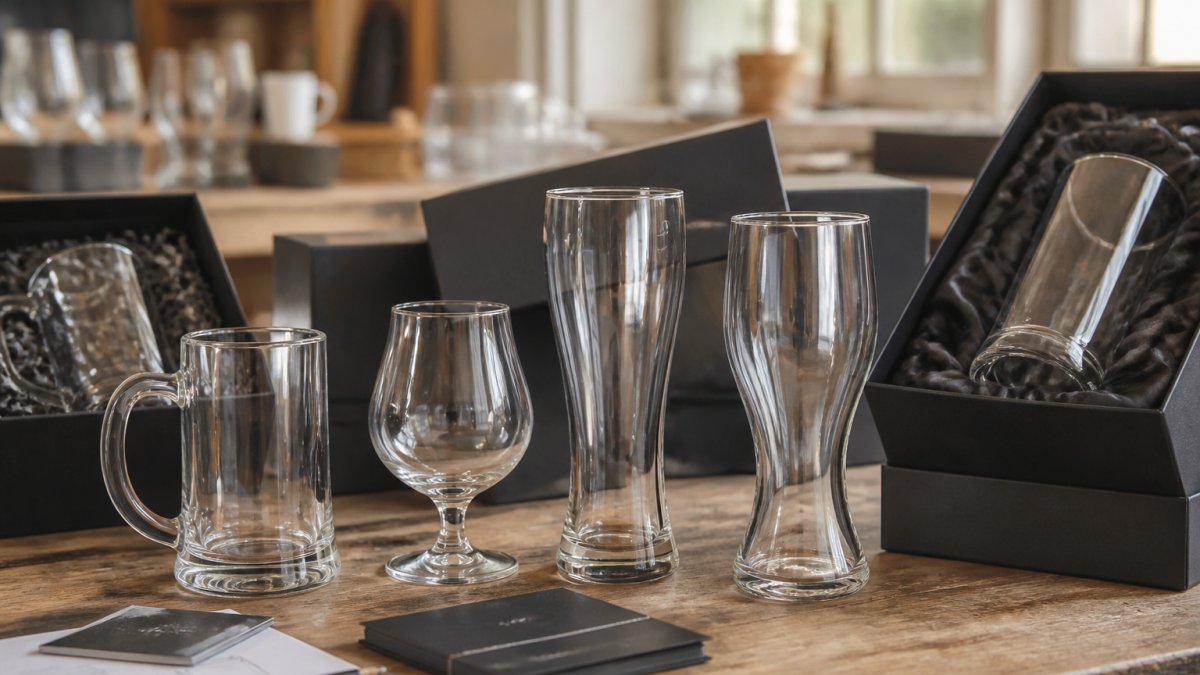
- Pint glass: generous flat sides, plenty of room for a wide logo
- Pilsner glass: tall and tapered, best for a stacked or vertical mark
- Beer stein: heavy glass walls, ideal for deep etching
- Tasting glass: small surface area, so simplify the mark hard
Curved surfaces are the tricky part: a logo printed near the base of a tapered glass distorts unless the artwork is adjusted for the curve. That's a production step, not a design flaw, so ask early.
Glass Size and Capacity: 290 ml, 390 ml and Beyond
Glass size and capacity drive both cost and legibility. A 290 ml glass has far less usable print area than a 390 ml one, and a small mark on a big glass looks lost.
Standard capacities we work with most often:
| Capacity | Typical Use | Print Area |
|---|---|---|
| 290 ml | Tastings, flights, samples | Small, simple marks |
| 390 ml | Standard pours, taproom service | Medium logos, text |
| 500 ml+ | Steins, merchandise, gifts | Large logos, full wraps |
Smaller glasses suit one-colour, bold marks; bigger glasses give you room for a logo plus a tagline or event date. Weight matters too, a heavier base feels more premium, which counts if the glass is a gift rather than service stock.
Logo Placement on Beer Glasses: Where It Lands and Why
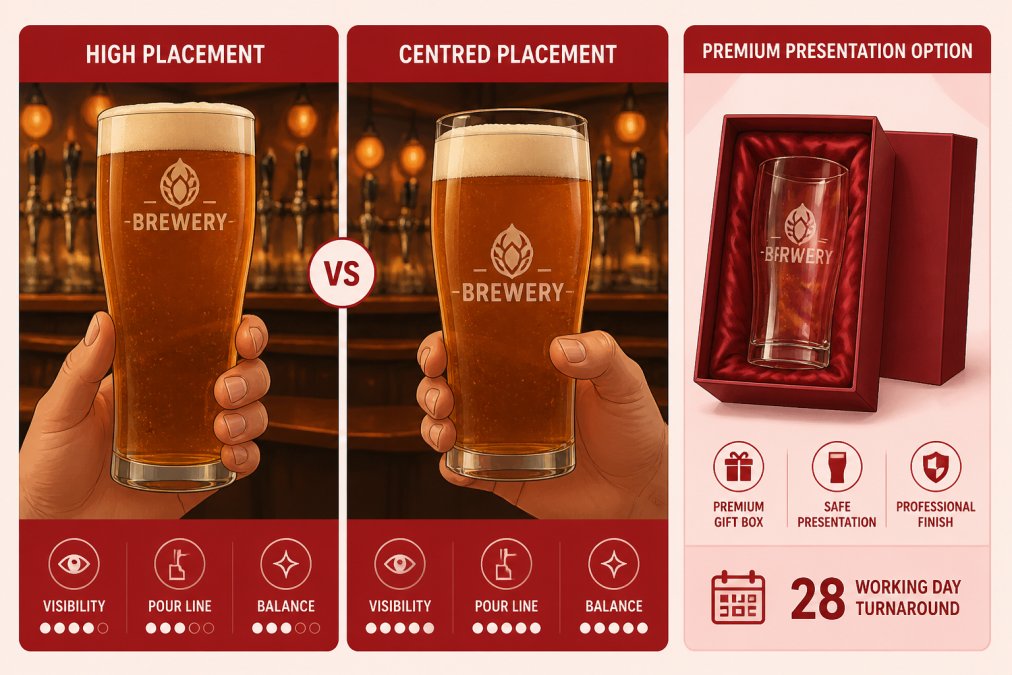
Logo placement on beer glasses should sit in the upper third, on the side facing the drinker, so it stays visible while the glass is held and while it's on the table.
Placement options and what each one does:
- Upper third: most visible, best for recognition
- Centred: balanced look, works well for gifts
- Lower third: subtle, often covered by the hand
- Base or foot: a hidden detail, good for premium pieces
Print Position and Legibility Testing
Print position and legibility testing catch problems before production, not after. Test the mark at actual size on a plain glass first.
A quick check that saves reprints:
- Print your logo on paper at true size
- Wrap it around a spare glass of the same shape
- Hold it at arm's length and read it
- If you can't read it in two seconds, simplify it
Thin lines and small text are the usual casualties. Fine detail that looks crisp on a monitor often fills in or disappears once printed or etched.
Beer Glass Logo Ideas That Survive a Busy Bar
Beer glass logo ideas that survive a busy bar share one trait: they work at a glance. A crowded taproom is no place for intricate detail.
Ideas worth testing:
- Bold wordmark: your brewery name, large and clean
- Single icon: one strong symbol, no text
- Stacked layout: icon above name, good for tapered glasses
- Wrap-around: the mark repeats, so it's visible from any angle
- Collectible series: a new design each season, same base layout
Collectible glassware is its own category: a limited run tied to a seasonal release or anniversary gives customers a reason to keep the glass, which keeps your brand in their cupboard. For corporate clients, a clean, single mark beats a logo crammed with a tagline, website and phone number.
Choosing a Branding Method: Pad Printing, Engraving or Etching
Choosing a branding method comes down to four things: how it looks, how it wears, how many colours you need and how much it costs per unit.
Pad printing uses a silicone pad to transfer ink from an etched plate onto the glass.
Screen printing pushes ink through a mesh screen directly onto the glass, laying down a thicker, more opaque layer than pad printing.
Laser engraving removes a thin layer of glass to create a frosted mark.
Etching (chemical or sandblasting) creates a similar frosted finish, often deeper and more even across curved surfaces. Like laser engraving, it's permanent and single-tone.
Decals are applied as a transfer and fired onto the glass, allowing full-colour, photographic-quality artwork common on retail merchandise, but they add a production step and cost more per unit.
| Method | Look | Durability | Colours | Best For |
|---|---|---|---|---|
| Pad printing | Sharp, fine detail | Moderate | Multi-colour | Detailed logos, short runs |
| Screen printing | Bold, opaque | Moderate | 1-2 colours | Strong one-colour marks |
| Laser engraving | Frosted, subtle | High | One tone | Premium gifts, permanent marks |
| Etching | Frosted, deep | High | One tone | Curved glasses, collectibles |
| Decals | Full colour | Moderate-high | Full colour | Retail merchandise, photographic art |
Matching the Method to the Glass Shape
The glass shape narrows the choice further. A tapered pilsner is hard to screen print because the screen can't sit flat against the curve, etching handles it better. A heavy stein takes deep etching well, while a small tasting glass has so little flat surface that a single bold mark is usually all that reads.
One-Color Print, Colour Count and What Glass Allows
One-colour print is the most reliable and usually the most cost-effective choice for glass.
What to know about colour on glass:
- Glass is transparent, so ink colour shifts against the drink behind it
- Dark or frosted marks hold up best across all methods
Etched Logo Glassware: Artwork Files, Tolerances and Production Constraints
Etched logo glassware lives or dies on the artwork file. A clean vector file runs smoothly; a low-resolution image must be redrawn, which adds days and often changes how the mark looks.
Logo Artwork Specifications and File Preparation
Logo artwork specifications and file preparation are where most delays start. Here's what a production-ready file looks like:
- Format: vector (AI, EPS, PDF or SVG). Vector scales without loss, so the same file works on a 290 ml tasting glass and a 500 ml stein.
- Text: converted to outlines, so fonts don't shift or substitute on the production machine.
- Lines: minimum weight of about 0.5 mm for etching. Anything thinner can fill in or disappear.
- Colour: single spot colour or black for a one-colour mark.
- Resolution: vector is scalable; if you only have a raster file, supply it at 300 dpi minimum at final print size.
Safe areas matter as much as line weight. Keep your mark at least 10-15 mm from the rim and base. Glass is formed, not machined, so edges vary slightly piece to piece, and a logo placed too close can look off-centre on some glasses.
Simplifying a detailed mark is often the difference between a clean etch and a muddy one. If your logo has fine hatching, thin serifs or small text, ask your designer for a simplified version: thicker strokes, fewer elements, larger negative space. A mark reduced to its strongest single shape etches better than a faithful copy of a complex logo.
Production constraints to plan around:
- Very fine detail can fill in during etching
- Logos spanning a sharp curve may need adjustment or a slight distortion correction
- Deep etching on thin-walled glasses can weaken the glass, so wall thickness limits etch depth
If you're ordering etched glassware as a gift or premium set, our custom manufactured gift boxing service pairs the glass with a presentation box, with a turnaround of around 28 working days.
Proofing, Colour Matching and the Production Workflow
Proofing, colour matching and the production workflow protect you from surprises. A good supplier shows you a proof before anything is made.
A typical workflow looks like this:
- You send your logo and choose the glass
- The supplier prepares a digital proof showing size and placement
- You approve the proof, or request changes
- A physical sample is produced if the job is large or complex
- Production runs, then the order ships
If you reorder the same design every quarter, ask your supplier to hold your approved proof on file; that single step prevents most consistency issues between batches.
For official guidance on labelling and product claims on promotional goods, the ACCC advertising and selling guide is worth a read before you print anything.
Branded Glassware Gift Boxes and Dishwasher Durability
Branded glassware gift boxes turn a functional item into a presentation piece. A glass in a plain carton reads as merchandise.
We offer a custom manufactured gift boxing service for etched and branded glassware, with a turnaround of around 28 working days.
Durability is the other half of the equation. How the methods hold up to washing:
- Etching and laser engraving: permanent, unaffected by dishwashing
- Hand washing: extends the life of any decorated glass
For commercial settings, etching is the safer bet. A few care notes:
- Wash etched and printed glassware in a mild detergent
- Avoid abrasive sponges, which can dull a frosted finish
- Stack carefully, since glass-on-glass contact causes chips
If your glasses will run through a commercial dishwasher daily, tell your supplier upfront. It changes the recommendation.
Safe Work Australia guidance on workplace safety is a useful reference if you're stocking glassware in a hospitality venue.
Getting branded glassware right comes down to planning the glass, the artwork and the method in the right order.
Get started with The Glassware Company and request an online quote for your custom beer glass order.
Frequently Asked Questions
How do you put a logo on a beer glass?
Engraving or etching cuts the design into the glass itself, producing a permanent frosted finish that will not peel or fade. Both need print-ready vector artwork, and are quoted per order based on quantity and glass style. Ask for a proof before production starts so you approve the exact layout.
Where should a logo go on a beer glass?
Most logos sit centred on the front panel, roughly 20 to 30 mm below the rim, so the branding stays visible while the glass is held. Avoid the base and the area your hand covers. If the glass has a tapered shape, place the logo on the widest flat section. Always test legibility at arm's length before approving, because a design that reads well on a screen can disappear once the glass is full.
Will etched logo glassware survive a commercial dishwasher?
Etched and engraved glassware holds up well because the design is cut into the glass rather than applied on top. Hand washing extends the life of any decorated glass. Ask about dishwasher durability and food-contact considerations before you commit to a large run.
Can detailed artwork be reproduced on a beer glass?
Fine detail is possible, but glass has production constraints. Very thin lines, small text and tight gradients can close up or blur during printing or etching. Simplify the logo to its strongest elements, keep text above roughly 6 mm tall, and supply vector artwork with clean edges. A proof lets you see how the design translates before anything goes into production.